
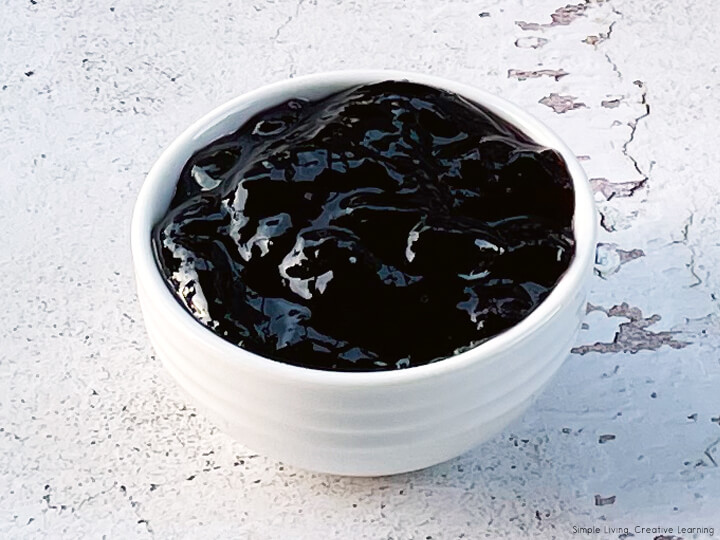
This mulberry and apple jelly has only five ingredients and is quite simple to make and tastes absolutely amazing, especially on warm, fresh bread. It is a great way to use those delicious homegrown mulberries.

Mulberry and Apple Jelly
Our mulberry trees have been growing so well. The amount of fruit we are able to harvest, is amazing. A great way to use these fresh berries straight from the garden, is this delicious jam which can be eaten on toast, a sandwich, on scones or pancakes.
To make around 2 ½ kg or 6 jars of this jam, you will need:
- 1 ½ kg mulberries
- 500g Granny Smith apples, or some other tart apples
- ½ cup lemon juice
- 1 ½ kg white sugar
- dash of butter
Prepare your jars and lids that you will be putting your jelly into.
Prepare the mulberries by washing and draining well. Make sure to cut off the stalks of the fruit.
Wash the apples, peel and core, then chop into small pieces.
Place the apples and mulberries into a large, heavy-based saucepan and cover with water.
Bring to the boil, then simmer, mashing the fruit to release the juice.
To remove any forgotten stalks and the seeds of the mulberries by running the mulberry mixture though a food mill or fine sieve.
Pour the pulp and juice of the mulberries and apples into a large, heavy-based saucepan.
Add the sugar and the lemon and whisk over medium heat until the sugar has dissolved.
Bring to the boil, stirring constantly.
Add a dash of butter.
Boil for around 20 to 30 minutes until the mixture reaches gel stage.
Skim off and discard any foam.
Ladle the hot jelly into hot jars, leaving ¼ in (0.5cm) headspace.
Process in a boiling water bath canner for 10 minutes.
Store this mulberry and apple jelly in a cool, dry, dark place for up to 12 months.
Getting Jam to Set
For jams to thicken and set, they need a substance known as pectin. Some fruits naturally contain more pectin than others. When making jams and jellies with low-pectin fruits, often lemon juice is added.
If you are using low-pectin fruits in your jam, such as with this one, you should also add some lemon juice or perhaps mix in some high-pectin fruit to help your jam to set. Alternatively, using jam sugar with low-pectin fruit works well.
To make jam, you need to soften the fruit first. We like our jam relatively smooth, so while softening the fruit, I used a masher to mash it to a smooth puree, though this is just our personal taste.
The mixture will then need to boil and thicken and you will need to stir it frequently so that it doesn’t burn or stick to the bottom of the pot. If you have a candy thermometer, it needs to read 105°C (220°F), though you will need to keep a close eye on the mixture when it starts getting around this temperature.
If you don’t have a thermometer, you can use the jam / cold plate test. Before starting your jam, simply place 3 or 4 small plates in the freezer. When you think the jam may be ready, place a small teaspoon amount of jam onto one of the cold plates from the freezer and let it sit for about 30 seconds. Then run your finger through the middle of the blob of jam. If the line starts to fill back over, it means the jam is too runny and is not ready yet, so keep cooking and repeat again in about five minutes. If the line remains, then the jam has reached setting point and is ready.
This jam needs to be placed into sterilised jars. This recipe makes about 1 x 450ml jar of mulberry jam, so you won’t need too many jars. It will need to be stored in the fridge and should last about 1-3 months this way. Though, if you follow the correct instructions for canning (the hot water bath method), you will be able to store it in the pantry for up to two years.
More Mulberry Recipes
Why Didn’t my Jam Set?
There are many reasons as to why your jam didn’t set. It may have needed to be cooked longer or sometimes, the fruit you used didn’t have enough natural sugar and needed a little more pectin added.
If you followed these instructions and your jam didn’t set properly, place your jam in the fridge overnight. If it isn’t set in the morning, you could try re-cooking it a bit longer and maybe adding a bit of pectin or some more sugar and lemon, though have a taste test you don’t want to add too much that it may affect the flavour.
Sterilisation
There are a few ways to sterilise your jars, this is the one I use.
Wash the jars and lids in hot, soapy water. Rinse the jars in hot water and place upside down on racks in an oven heated to 120˚c. You can line the racks with baking paper first if you want. Heat the jars for 20 minutes. Do not place cold jam into hot jars or they may crack and break.
Other Bread and Spread Recipes
- Milk Bread Rolls
- Homemade Bread
- Pumpkin and Blueberry Bread
- Pizza Bread
- Strawberry Jam
- Rosella Jam
- Slowcooker Apple Butter
- Orange and Lemon Marmalade
- Lemon Curd
- Blueberry Jam
- Passionfruit Curd
- Apple Scrap Jelly

Mulberry and Apple Jelly
Ingredients
- 1 ½ kg Mulberries
- 500 g Granny Smith Apples, or some other tart apple
- 1 1/2 kg White Sugar
- 1/2 cup Lemon Juice
- Dash of Butter
Instructions
- Prepare your jars and lids that you will be putting your jelly into.
- Prepare the mulberries by washing and draining well. Make sure to cut off the stalks of the fruit.
- Wash the apples, peel and core, then chop into small pieces.
- Place the apples and mulberries into a large, heavy-based saucepan and cover with water.
- Bring to the boil, then simmer, mashing the fruit to release the juice.
- To remove any forgotten stalks and the seeds of the mulberries by running the mulberry mixture though a food mill or fine sieve.
- Pour the pulp and juice of the mulberries and apples into a large, heavy-based saucepan.
- Add the sugar and the lemon and whisk over medium heat until the sugar has dissolved.
- Bring to the boil, stirring constantly.
- Add a dash of butter.
- Boil for around 20 to 30 minutes until the mixture reaches gel stage. The mixture will then need to boil and thicken and you will need to stir it frequently so that it doesn’t burn or stick to the bottom of the pot. If you have a candy thermometer, it needs to read 105°C (220°F), though you will need to keep a close eye on the mixture when it starts getting around this temperature.If you don’t have a thermometer, you can use the jam / cold plate test. Before starting your jam, simply place 3 or 4 small plates in the freezer. When you think the jam may be ready, place a small teaspoon amount of jam onto one of the cold plates from the freezer and let it sit for about 30 seconds. Then run your finger through the middle of the blob of jam. If the line starts to fill back over, it means the jam is too runny and is not ready yet, so keep cooking and repeat again in about five minutes. If the line remains, then the jam has reached setting point and is ready.
- When done, skim off and discard any foam.
- Ladle the hot jelly into hot jars, leaving ¼ in (0.5cm) headspace.
- Process in a boiling water bath canner for 10 minutes.
Nutritional information is an estimate and provided as a courtesy. The values may vary according to the ingredients and tools that are used. Please use your preferred nutritional calculator for more detailed information.
 Aesop’s Fables Printables: The Dog in the Manger Printables