
These homemade Facial Lotion Bars are amazing to use, helping to moisturise and nourish your skin.

What exactly is a lotion bar?
A lotion bar is a great alternative to a liquid water-based body lotion. They contain oil and are solid which makes them simple to make and easy to use. They are also very cost effective since they melt on contact with your skin, therefore less of the bar is used.
Using Lotion Bars
When ready to use, simply rub the lotion bar on your body and allow it to absorb into your skin. I love to use it in the morning after my shower.

Storing Lotion Bars
Store in an airtight container, out of direct sunlight, in a cool room for up to one year.
These lotion bars will stay solid, though they may start to melt in hot temperatures. If you are in a warmer climate, you may need to keep the bars in the fridge.
Tips
- If they come out a little to greasy, then try increasing the amount of shea butter while decreasing the amount of sweet almond oil.
- If your lime lotion bars come out a little sticky, remelt and add more sweet almond oil to the mixture.
- Store these lotion bars at room temperature in a glass jar or metal tin. Though if you live in a very hot climate, you may need to put them in the fridge in the warmer months of the year.
- These lotion bars will last up to one year.
- Be careful when using essential oils – use lime distilled essential oil in this recipe as it is not phototoxic. Make sure to do your research first and use with extreme care. Cold-pressed Lime essential oil is phototoxic, and can cause negative reactions on your skin in sunlight—such as burning, blistering, or discolouration.

Carrier Oils
When making these lotion bars, choosing the correct carrier oil for the infused oil can improve the impact of the bars as each carrier oil has its own set of distinct properties. Blending a couple of carrier oils can also help maximise their benefits.
With this lotion bar recipe, there are multiple carrier oils that could be used including:
- Hemp Seed Oil is great for the face and gives these bars a little green tint
- Avocado Oil
- Sweet Almond Oil
- Argan Oil
- Rosehip Oil
- Hemp Oil
- Safflower Oil
You can learn more about carrier oils here.
Before Using these Bars
Before using these bars, you will need to understand a few things.
- Don’t use on skin with open wounds or cuts.
- Test on small area of skin before using. If there’s any irritation, dilute with more carrier oils.
- Wash hands well after using.
Ingredients Needed to Make Facial Lotion Bars
To Make these Lotion Bars, you will need:
- ½ Cup Infused Oil Hemp Seed Infused Oil – Infused with Chamomile, Calendula, Lavender and Helichrysum
- ½ Cup Beeswax
- ½ Cup Shea Butter
- ¼ tsp Vitamin E Oil
- 12 Drops Green Tea CO2 Extract Oil (from Plant Therapy)
- 12 Drops Frankincense Essential Oil

Making Infused Oil
To make these facial bars, first you need to make an infused oil.
To make the infused oil, you will need:
- ½ cup Dried Chamomile, Calendula, Lavender and Helichrysum Flowers
- 1 cup Hemp Seed Oil or another carrier oil of your choice
First you will need to infuse the dried flowers in the hemp seed oil. If you have fresh flowers, let them dry for at least a day or two before infusing.
Place the dry flowers in a glass jar and cover it completely with oil.

Put the lid on the jar and store in a dark cupboard for two to four weeks, shaking every couple of days to keep everything submerged.
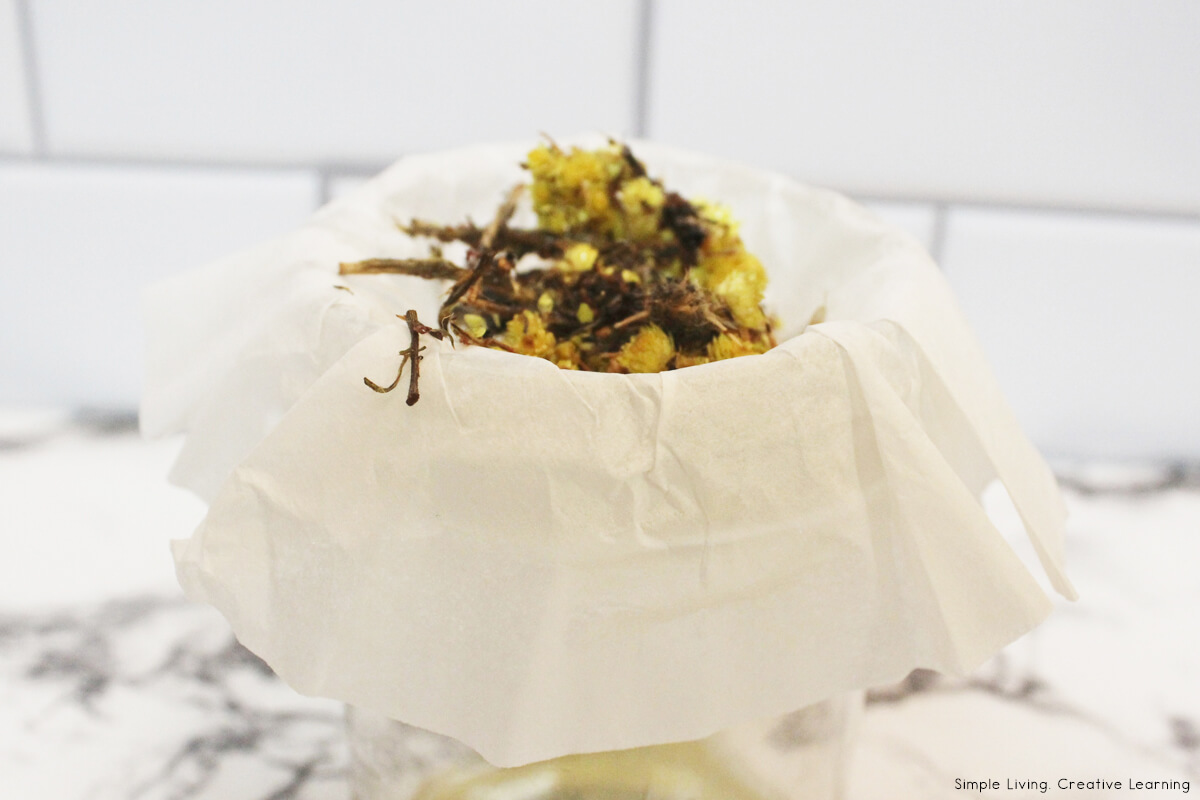
Strain the leaves with a strainer, cheesecloth or an unbleached coffee filter. The infused oil is now ready to use in this facial bar recipe.
If you want to speed up the infusion process, slowly heat the oil in a slow cooker on low heat for 24 – 48 hours.
For more information on making infused oils, check this out.
Making Facial Lotion Bars
Combine the beeswax, shea butter and the infused oil in a microwaveable jug and heat for 30 seconds at a time in the microwave until the beeswax is completely melted. Stir in between each heat burst.

This process could also be done in a double boiler.

Add the essential oils and the vitamin E oil and mix thoroughly to combine.

Pour into the moulds and let sit overnight or until they are fully solid.

Store at room temperature, in a cool, dry place.

Using Facial Lotion Bars
Rub the facial bar between your hands until it starts to melt. Then, rub it onto your face.
It is best to use this bar at night to allow the oils to fully soak into your skin.
Notes
- If you are picking fresh flowers to use in these bars, make sure to harvest them from a pesticide free area.
- Harvest only when you are 100% positive you have the correct plant as there are many lookalikes which are inedible or poisonous.
- Vitamin E is optional, and is often added to salves and bars as an antioxidant to prevent rancidity, as well as for its amazing skin-healing properties.
- You can use any type of carrier oil for the infused oil. This recipe uses hemp seed oil.
- If you want, swap out beeswax pellets for candelilla wax.
- I live in a hot climate, so prefer to use a little more beeswax to stop it from melting during our hot summers, thus making this a harder salve. Use less beeswax if you want a softer bar.

More Lotion Bars
- Snowflake Lotion Bars
- Lime Lotion Bars
- Sweet Orange and Vanilla Lotion Bars
- Dandelion Lotion Bars
- Lemongrass Lotion Bars
- Hard Lotion Bars
- Calamine Lotion Soap Bars

Homemade Facial Lotion Bars
Ingredients
Infused Oil
- ½ Cup Dried Chamomile, Calendula, Lavender and Helichrysum Flowers
- 1 Cup Hemp Seed Oil or another carrier oil
Facial Lotion Bars
- ½ Cup Infused Oil
- ½ Cup Beeswax
- ½ Cup Shea Butter
- ¼ tsp Vitamin E Oil
- 12 Drops Green Tea CO2 Extract Oil
- 12 Drops Frankincense Essential Oil
Instructions
Making Infused Oil
- First you will need to infuse the dried flowers in the hemp seed oil. If you have fresh flowers, let them dry for at least a day or two before infusing.
- Place the dry flowers in a glass jar and cover it completely with oil.

- Put the lid on the jar and store in a dark cupboard for two to four weeks, shaking every couple of days to keep everything submerged.
- Strain the leaves with a strainer, cheesecloth or an unbleached coffee filter. The infused oil is now ready to use in this facial bar recipe.
- If you want to speed up the infusion process, slowly heat the oil in a slow cooker on low heat for 24 – 48 hours.For more information on making infused oils, check this out.


Making Facial Lotion Bars
- Combine the beeswax, shea butter and the infused oil in a microwaveable jug and heat for 30 seconds at a time in the microwave until the beeswax is completely melted. Stir in between each heat burst. This process could also be done in a double boiler.
- Add the essential oils and the vitamin E oil and mix thoroughly to combine.
- Pour into the moulds and let sit overnight or until they are fully solid.
- Store at room temperature, in a cool, dry place.
- To Use - Rub the facial bar between your hands until it starts to melt. Then, rub it onto your face. It is best to use this bar at night to allow the oils to fully soak into your skin.


Disclaimer: These statements have not been evaluated by the Food & Drug Administration. The information on this site is not intended or implied to be a substitute for professional medical advice, diagnosis or treatment. Never disregard professional medical advice or delay seeking medical treatment because of something you have read on this website.
 Homemade Whole Wheat Pasta