
Fermented Chicken Feed is a great addition to your flocks diet which can help with improving their overall health, lower feed costs and provide you with better eggs.

Fermented Chicken Feed
You may have already heard the buzz about fermented feed, but have you tried it for yourself? By working fermented feed into your flocks menu a couple of times a week, you will find that it provides four major benefits:
- Improvement of flock health
- Better eggs
- Lower feed costs
- Less poop
While it does take a little work each day, the time needed is minimal, but the upside makes it so worth it!

What kind of Feed Can be Fermented?
So, you want to ferment some feed for your chickens, but what feed can be used?
Most types of chicken feed can be fermented. This includes:
- Crumble
- Pellets
- Whole Grain Chicken Feed
- Chick Starter

Below, I will share the way I keep a rotation of fermented feed that it given to our birds twice a week. Fermented chicken feed can be given to your birds daily. To do this, you will just need to adjust the schedule.
Chicken food can be fermented anywhere from two to seven days, but if it begins to mould, it will need to be tossed out and a new batch started.
To work out how much feed you need to make, multiply the number of chickens you will be feeding by 114g (¼ lb). This amount is roughly what they would eat in a day. If this is the first time you are feeding fermented feed to your chickens, I recommend starting with ½ of the amount suggested – so half of 114g/ ¼ lb – as this is a great way to introduce it to your birds.
Fermenting Chicken Feed
To make fermented chicken feed, you will need:
- chicken food
- large container
- water

Place the amount of feed you wish to ferment into a large container.

Cover with water to about 5 cm (2 inches) above the surface of the feed.
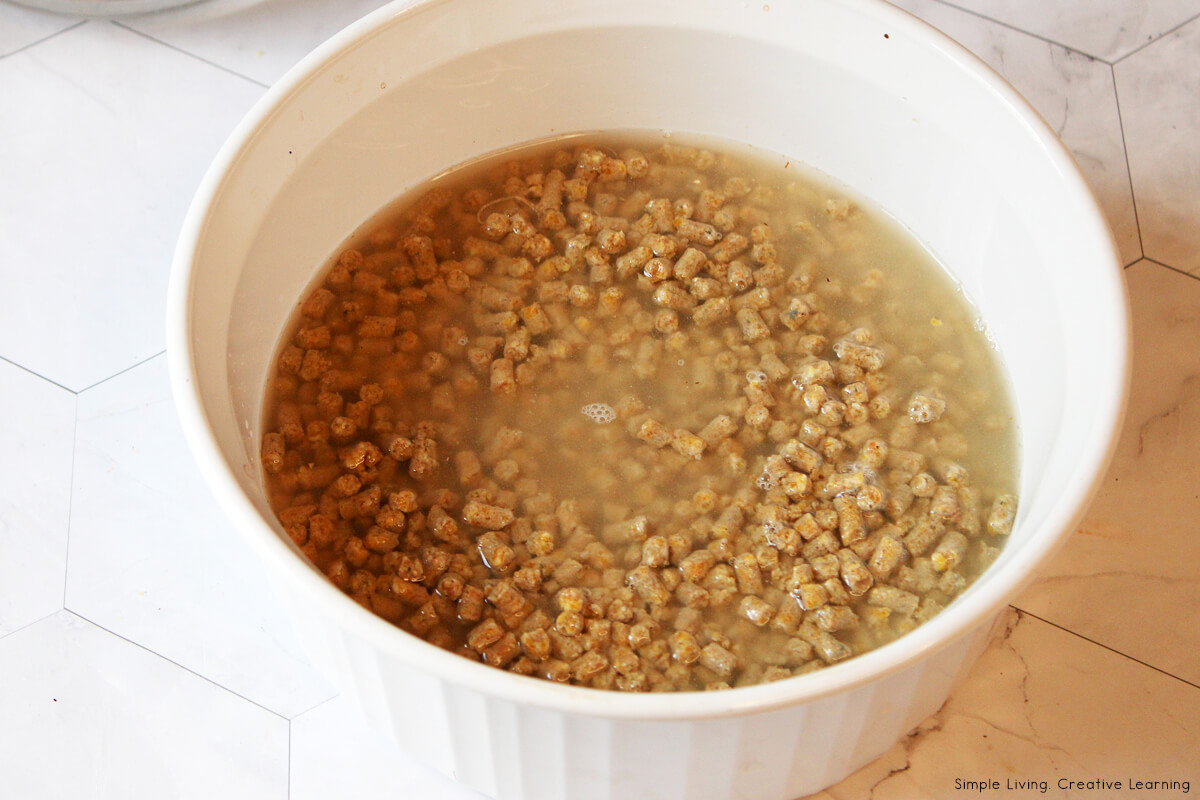
Add the lid and allow to sit for two to three days, adding water as needed to keep the top under water. Stir the mixture in the morning and the evening of each day as you check the water level.
By day two, the feed should have a yeast smell like that of sourdough bread and at least some bubbles.
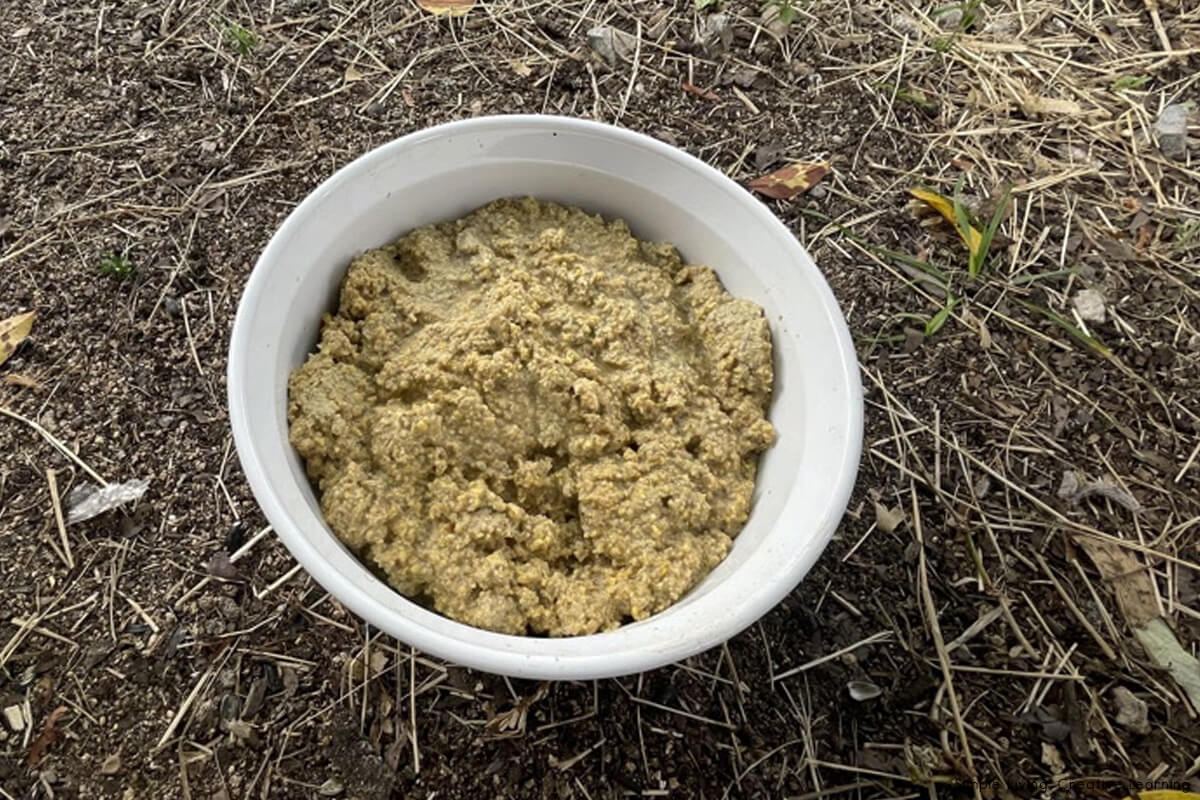
I find that day three is a sweet spot, though this does depend on the weather. The hotter it is, the quicker the feed seems to ferment.
When ready to feed your flock, take your container outside and place the fermented feed in a bowl in their run.
The chickens might be skeptical at first, but I guarantee they will end up loving it.
The simplest way to add it bi-weekly is to keep a fermented feed process on a schedule. Check out this simple schedule:
- Day 1 – Start your batch of fermented feed following the directions above.
- Day 2 – Stir in the morning and in the evening, adding a little water so that it is covered, if needed.
- Day 3 – Stir in the morning and evening again, adding a little water if needed.
- Day 4 – Drain the water and serve to your flock.
- Day 5 – Start a new batch in your container as above.
- Day 6 – Stir in the morning and evening again, adding a little water if needed.
- Day 7 – Stir and serve if ready.
More Animal Treats
- Flock Block for Chickens
- Sprouting Lentils for your Chickens
- Rockmelon and Yoghurt Dog Treats
- Chicken Dog Treats
- Vegetable Dog Biscuits

Fermented Chicken Feed
Ingredients
- Chicken food
- Large Container
- Water
Instructions
- Place the amount of feed you wish to ferment into a large container.

- Cover with water to about 5 cm (2 inches) above the surface of the feed.
- Add the lid and allow to sit for two to three days, adding water as needed to keep the top under water. Stir the mixture in the morning and the evening of each day as you check the water level.
- By day two, the feed should have a yeast smell like that of sourdough bread and at least some bubbles.
- I find that day three is a sweet spot, though this does depend on the weather. The hotter it is, the quicker the feed seems to ferment.
- When ready to feed your flock, take your container outside and place the fermented feed in a bowl in their run.
- The chickens might be skeptical at first, but I guarantee they will end up loving it.


Notes
- Day 1 - Start your batch of fermented feed following the directions above.
- Day 2 - Stir in the morning and in the evening, adding a little water so that it is covered, if needed.
- Day 3 - Stir in the morning and evening again, adding a little water if needed.
- Day 4 - Drain the water and serve to your flock.
- Day 5 - Start a new batch in your container as above.
- Day 6 - Stir in the morning and evening again, adding a little water if needed.
- Day 7 - Stir and serve if ready.
 Homemade Vanilla Hot Cocoa Mix