
This easy homemade hibiscus melt and pour soap has a lovely floral scent, a luxurious appearance and is bursting with fabulous benefits for your skin.

Hibiscus Soap
Making homemade soap is not only cheaper, but you know exactly what is going into the bars, leaving out all the nasties. Your skin is the largest organ in the body and needs to be cared for properly.
It is said that hibiscus is a powerful anti-aging plant that is filled with collagen boosting properties. The results of adding hibiscus powder to your soap can result in softer, younger looking skin! It can also:
- Help improve skin elasticity
- Tighten wrinkles and fine lines
- Speed up cell turnover
- Unclog pores to help prevent blackheads
- Control acne due to the anti-bacterial properties
- Exfoliate dead skin cells
- Reduce damage from UV rays
- Soothe skin
- Boost collagen production
Goat’s Milk Soap Base
Having a child that is allergic to certain ingredients found in many commercial soaps, I like to make my own soaps. Using a melt and pour soap is easy, especially when I don’t have a lot of time. Though there are many different types of melt and pour bases, the one I use the most is goat’s milk soap.
Some benefits of using goat’s milk soap base include:
- Has less allergenic than commercial soaps and detergents and has the closest PH level to our skin
- It is known to reduce skin inflammation and soothe dry and damaged skin
- Can help slow down the effects of aging, reducing wrinkles while moisturising the skin
- Is loaded with essential nutrients and vitamins including A, B6, C, B12, D and E
- Is easily absorbed into the skin
- Acts as a gentle exfoliator
- Soothes the skin helping with skin inflammation such including eczema and psoriasis
Essential Oils
Essential oils are potent, and need to be diluted. Make sure to do your research first and use with extreme care. As this soap is being used on your body, you will need to use essential oils that are gentle enough to be applied to your skin – and use in the correct quantities. Be careful to avoid sensitive areas like your eyes. Also, make sure to use oils that are safe for kids if using this soap on your kids.
Be careful when using some essential oils such as lemon. This is a photosensitive oil, which means that you can have a reaction if you go out in the sun within a few hours of using it. For this reason, when using Lemon essential oil in body care products, I use this Steam-Distilled Lemon Essential Oil from Plant Therapy as it is not phototoxic, which means you don’t have to worry about phototoxicity.
Lavender, Siberian fir, sweet orange, patchouli and lime essential oils would go well in this soap.
More Soap Bar Recipes
- Calendula Soap Bars
- Citrus Soap
- Grapefruit and Mint Soap
- Lavender Soap
- Charcoal Soap
- Lemon and Poppyseed Soap
- Honey Oatmeal Soap

Before Using this Soap
Before using this soap, you will need to understand a few things.
- Essential oils are potent, and need to be diluted. As this soap is being used on your body, you will need to use essential oils that are gentle enough to be applied to your skin – and use in the correct quantities. Be careful to avoid sensitive areas like your eyes.
- Be mindful of who will be using the soap when adding essential oils as some people can’t use some oils and some oils can’t be used on young children or pregnant and breastfeeding mothers. Some essential oils should not be used on children under 10. Do your research before adding and using any essential oils!
- Don’t use on skin with open wounds or cuts.
- Test on small area of skin before using. If there’s any irritation, dilute with more carrier oils.
Storing Soap Bars
The best way to store soap bars is to wrap the tightly and store in a cool, dry place out of direct sunlight.
Hibiscus Soap Notes
- Try adding 1 Tbsp dried hibiscus flower petals to the mixture before adding the essential oils.
- For a deeper colour, try adding up to 1 TBSP pink or red mica powder.
- Lavender or Siberian fir essential oils would go well in this soap.
- For more exfoliating properties, add a piece of loofah to the mould before pouring in the soap.

More Hibiscus (Rosella) Ideas
- Rosella Kombucha
- Rosella Jam
- How to Grow, Harvest and Use Rosella
- Rosella Syrup
- Rosella Cheesecake
- Hibiscus Hair Detangling Spray
Ingredients for Making Hibiscus Soap
To make 4 soap bars (if using the same mould), you will need:
- 1 lb goats milk melt and pour soap base (454g)
- 4 TBSP Hibiscus Powder
- 25 drops Essential Oils, optional
- Soap Mould

Making Hibiscus Soap
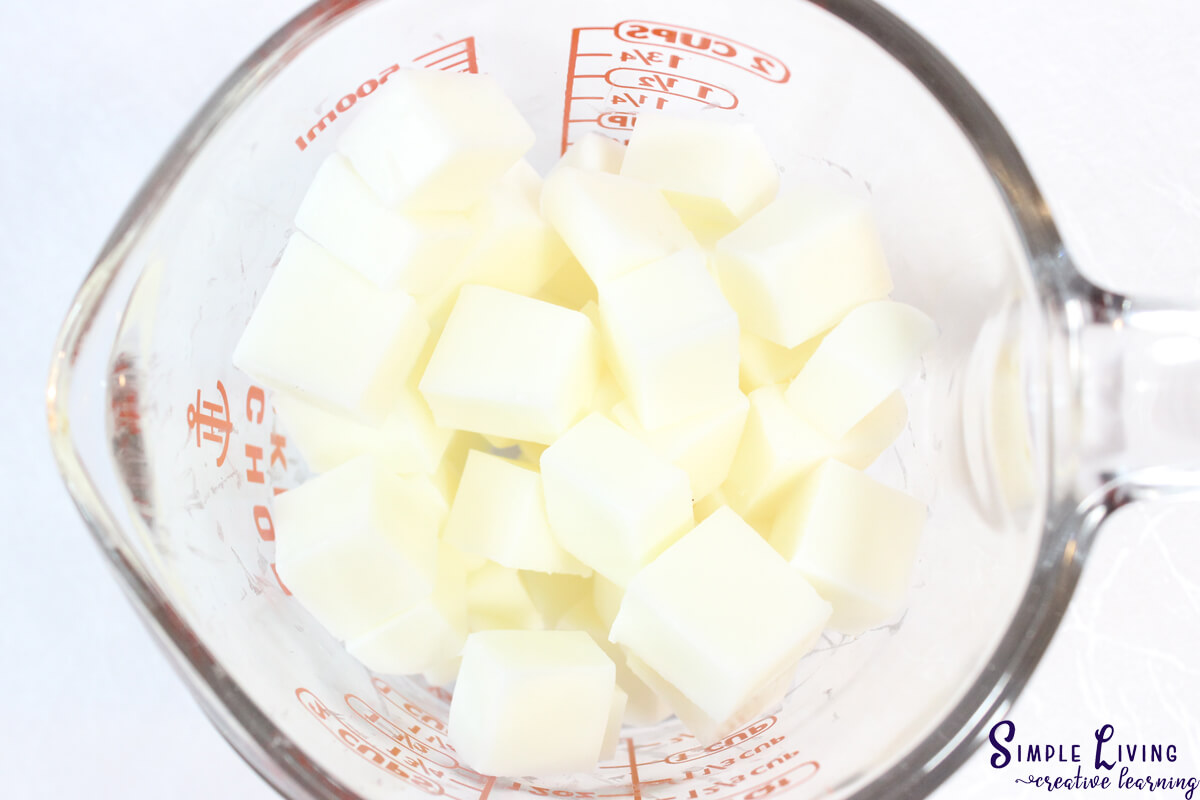
Chop up the melt and pour soap base into small, equal sized squares.

Place the squares in a large mason jar or glass jug.
Heat on high in the microwave for 30 seconds. When done, remove and stir.
Continue heating for 30 second intervals, stirring between each interval, until the soap base is melted. This process can also be done in a double boiler.

Once melted, add the hibiscus powder and stir until combined.

Let the mixture cool slightly, then add the essential oils if using and mix through.

Pour the soap into the soap mould.
Set aside for the soap to set until hard. This can take a few hours, though it is better to leave them set overnight.

Remove and store in a dry, dark place.


Homemade Hibiscus Soap
Equipment
Ingredients
- 1 lb Goats milk melt and pour soap base
- 4 TBSP Hibiscus Powder
- 25 Drops Essential Oil Optional
Instructions
- Chop up the melt and pour soap base into small, equal sized squares.

- Place the squares in a large mason jar or glass jug.
- Heat on high in the microwave for 30 seconds. When done, remove and stir.
- Continue heating for 30 second intervals, stirring between each interval, until the soap base is melted. This process can also be done in a double boiler.
- Once melted, add the hibiscus powder and stir until combined.
- Let the mixture cool slightly, then add the essential oils if using and mix through.
- Pour the soap into the soap mould.
- Set aside for the soap to set until hard. This can take a few hours, though it is better to leave them set overnight.
- Remove and store in a dry, dark place.


Disclaimer: These statements have not been evaluated by the Food & Drug Administration. The information on this site is not intended or implied to be a substitute for professional medical advice, diagnosis or treatment. Never disregard professional medical advice or delay seeking medical treatment because of something you have read on this website.
 South African Milk Tart {Melktert}