
Rock candy is a fun and edible experiment. It is also great for helping teach patience. It is easy and fun to make your own rock candy, though the week waiting for it to grow may be a little hard for some.
Rock Candy Experiment
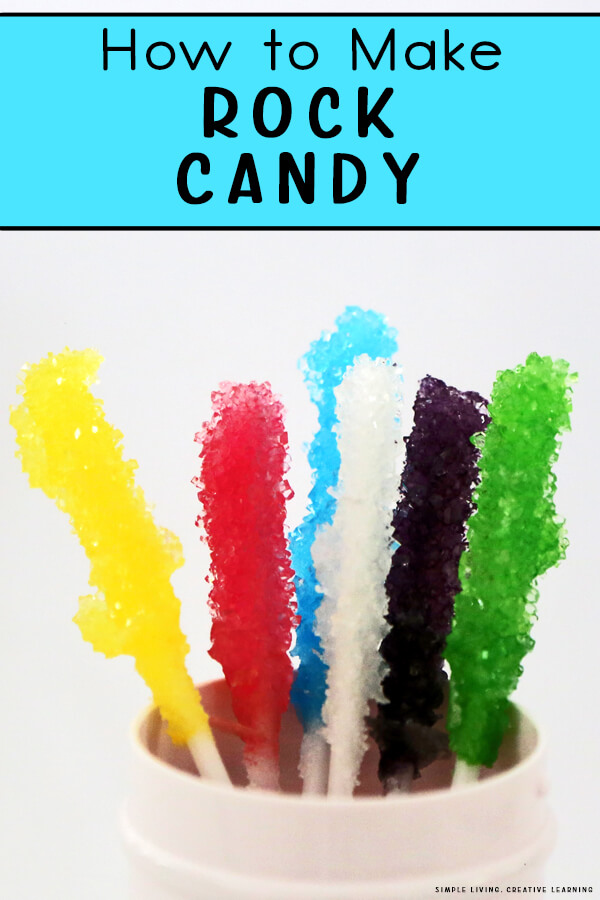
Rock candy is a fun science experiment that can be done at home. With endless colour and flavour combinations, kids will love watching the sugar crystals grow.
Sometimes known as sugar candy, it is easy to make, though it does take some time.
Ingredients to Make Rock Candy
To make your own rock candy, you will need:
- 1kg white sugar
- 2 cups water
- long cake-pop sticks or wooden skewers
- medium to large saucepan
- extra sugar for the ‘seeds’
- food colouring
- glass jars – one per colour
Adult supervision is also needed for the boiling and handling of the hot sugar syrup.
Making Rock Candy
1. Boil the water and the sugar in a saucepan until the sugar is dissolved as much as possible. It will look like a syrup when done.
2. Carefully, dip the top 5-7.5 cm of the cake-pop sticks or wooden skewers into the syrup and then roll in the extra sugar. Place on a piece of paper towel to dry. These will act as seeds for the sugar crystals to grow onto.
3. Let the syrup sit until it is room temperature, then pour it into the glass jars. Add the food colouring to each jar and stir.
4. Set the sugary end of the cake pops or wooden skewers into the syrup and let then sit for a week. During this time, gently move the sticks around so they don’t stick to the bottom of the jars. If too many sugar crystals grow on the bottom of the jars, pour the syrup into another jar and add your stick.
5. When the candy is done, place the cake pop sticks or wooden skewers on paper towel to drain the excess syrup off. Let them dry for around an hour and then enjoy!
Try looking at the sugar crystals under a microscope or magnifying glass!
How does this work?
Crystals are formed by a network of repeating patterns of molecules. Like the mortar that holds bricks together, the atoms and molecules are connected by atomic bonds. As the crystals have the same chemical composition, their molecules will always come together to form the same shape.
These rock candies grow when the sugar molecules in the syrup bind to the seed crystals of sugar that you rolled onto your sticks.

Other Science Experiment Resources
- Walking on Eggs
- Scientific Method Flip Book & Worksheets
- Strawberry DNA Experiment
- Rainy Day Experiment
- Carbon Dioxide Fire Extinguisher Experiment
- Elephant’s Toothpaste Experiment
- Jelly Bean Experiment
- 100+ Free Educational Resources
- Pop Rock Experiment

Rock Candy Experiment
Equipment
- Long Cake-Pop Sticks or wooden skewers
- Medium to large saucepan
- Glass Jars One per Colour
Ingredients
- 1 KG White Sugar
- 2 Cups Water
- Food Colouring
- Extra sugar for the 'seeds'
Instructions
- NOTE: Adult supervision is also needed for the boiling and handling of the hot sugar syrup.
- Boil the water and the sugar in a saucepan until the sugar is dissolved as much as possible. It will look like a syrup when done.
- Carefully, dip the top 5-7.5 cm of the cake-pop sticks or wooden skewers into the syrup and then roll in the extra sugar. Place on a piece of paper towel to dry. These will act as seeds for the sugar crystals to grow onto.
- Let the syrup sit until it is room temperature, then pour it into the glass jars. Add the food colouring to each jar and stir.
- Set the sugary end of the cake pops or wooden skewers into the syrup and let then sit for a week. During this time, gently move the sticks around so they don't stick to the bottom of the jars. If too many sugar crystals grow on the bottom of the jars, pour the syrup into another jar and add your stick.
- When the candy is done, place the cake pop sticks or wooden skewers on paper towel to drain the excess syrup off. Let them dry for around an hour and then enjoy!
- Try looking at the sugar crystals under a microscope or magnifying glass!
- Crystals are formed by a network of repeating patterns of molecules. Like the mortar that holds bricks together, the atoms and molecules are connected by atomic bonds. As the crystals have the same chemical composition, their molecules will always come together to form the same shape.These rock candies grow when the sugar molecules in the syrup bind to the seed crystals of sugar that you rolled onto your sticks.
 Teen Number Worksheets