
Easily make your own gorgeous, naturally dyed blueberry dyed eggs this Easter.
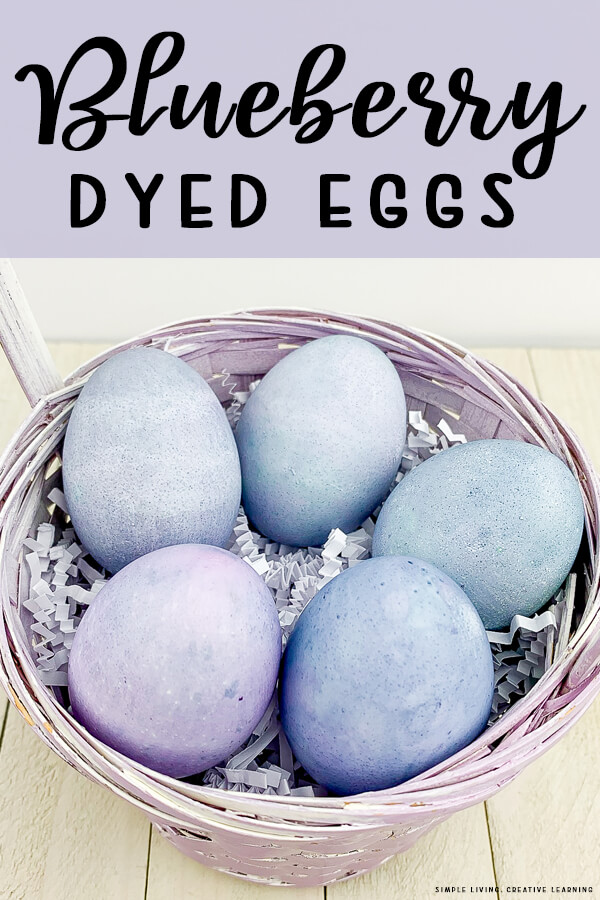
Blueberry Dyed Eggs
Dye eggs the natural way by using fruits or vegetables.
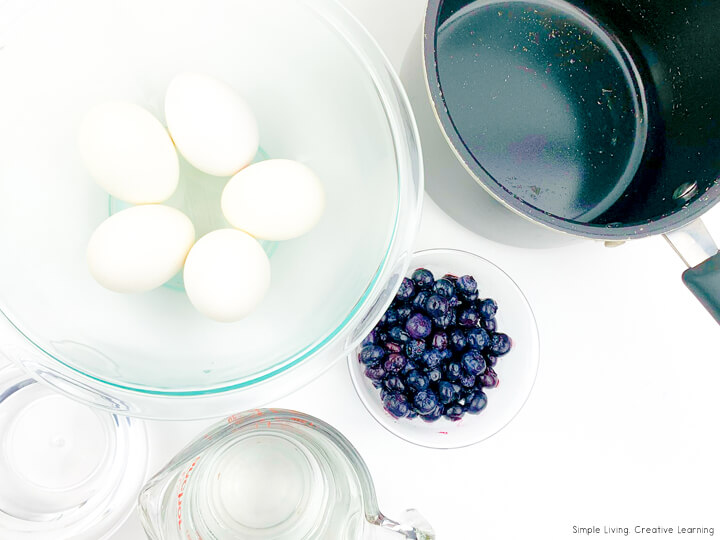
To make these gorgeous eggs, you will need:
- boiled eggs
- 1 cup fresh blueberries
- 1 cup water
- ½ cup of white vinegar
- spoon
- paper towel
- baking tray
- medium-sized saucepan
- colander
- jug
- containers for the vinegar and blueberry juice
- cup for dyeing – beg enough to fit a whole egg
To make these Eggs
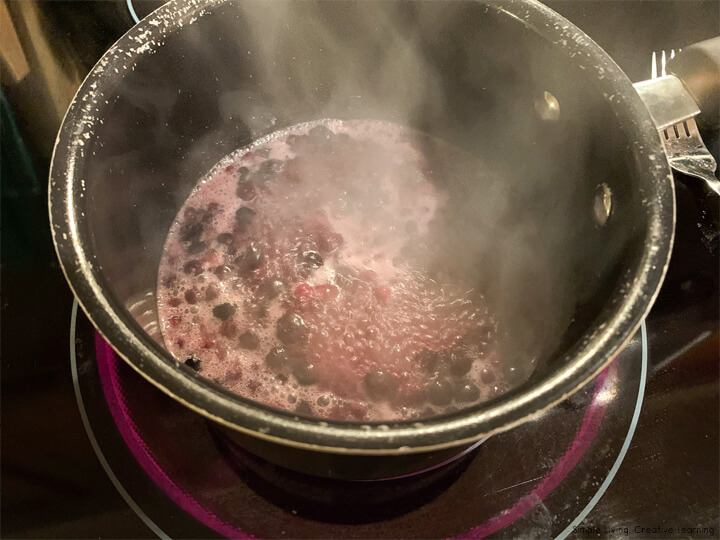
Line your baking tray with the paper towel. Then wash your blueberries and put them into the saucepan and add the water.

Gently bring the blueberries to a boil over medium heat, stirring occasionally. Then turn off heat and remove the saucepan. Set aside to allow the blueberries plenty of time to cool down.
Place a colander over the jug.
When the blueberries have cooled down, pour the mixture into the colander to separate the skins from the juice.

Discard the skins of the blueberries.
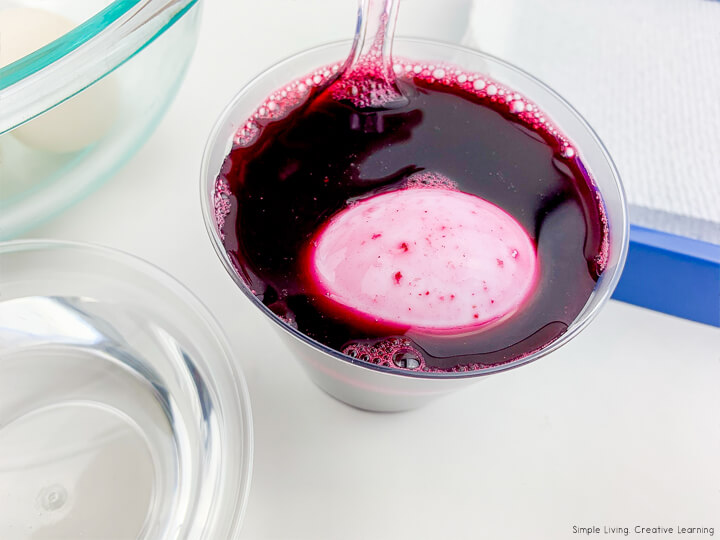
Pour the blueberry juice into a cup for dyeing. You’ll want it big enough to allow the whole egg to fit in the cup.
Dip one egg into the vinegar for a few seconds. Then place the egg into the blueberry juice. Leave it sit for 5 to 20 minutes, depending on how dark a colour you want.
Take the egg out of the juice using a spoon and place the egg on the paper towel lined tray.
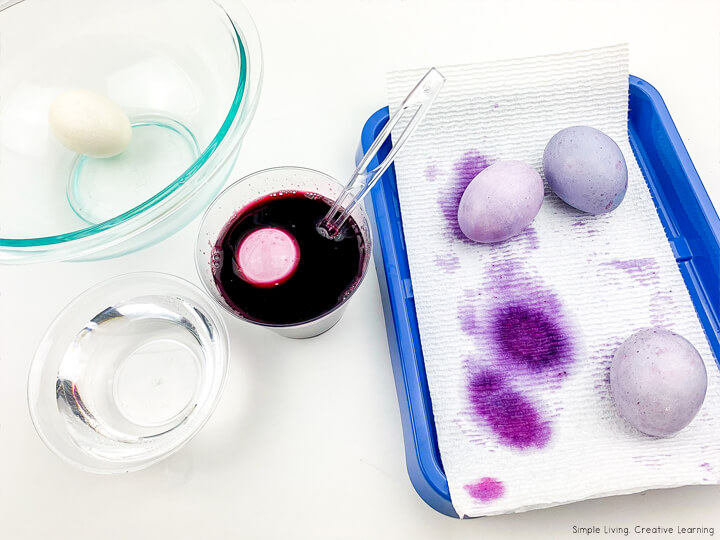
Roll the egg around on the paper towel to remove the remaining juice. (Try not to rub the egg with the paper towels to avoid removing or smearing the coloring.)
Allow the eggs to dry naturally once the excess juice is removed.

(Note: Try not to leave the egg in one place on the paper towel or you may end up with a lighter ‘stain’ or print from the paper towel on one side of the egg. For this project, I propped the eggs up against the tray once the excess juice was removed and the bottom of the egg was dried well.)

Repeat the steps with all eggs above until all eggs are dyed!
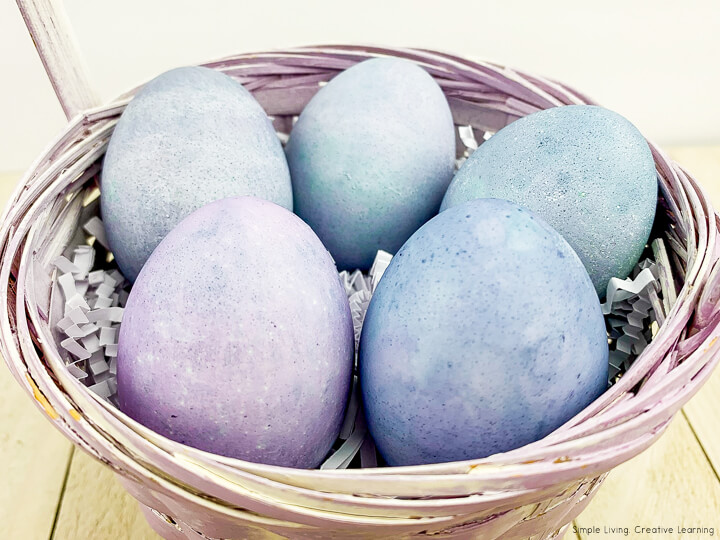
And the best part of this fun activity – the eggs are safe and edible with no toxic ingredients or paint needed to add decoration!
Storing Dyed Easter Eggs
As with all types of dyed eggs, they look their best right after dyeing. When they are placed in the fridge, they can look splotchy and uneven. If you are using these for Easter decor I recommend dying them the same day you are planning to use them. Though, if you are planning to eat these eggs, they do need to be kept in the fridge.


Blueberry Dyed Eggs
Ingredients
- 5 boiled eggs
- 1 cup fresh blueberries
- 1 cup water
- ½ cup white vinegar
- spoon
- paper towel
- baking tray
- medium-sized saucepan
- colander
- jug
- containers for the vinegar and blueberry juice
- cup for dyeing - beg enough to fit a whole egg
Instructions
- Line your baking tray with the paper towel. Then wash your blueberries and put them into the saucepan and add the water.
- Gently bring the blueberries to a boil over medium heat, stirring occasionally. Then turn off heat and remove the saucepan. Set aside to allow the blueberries plenty of time to cool down.
- Place a colander over the jug.
- When the blueberries have cooled down, pour the mixture into the colander to separate the skins from the juice.
- Discard the skins of the blueberries.
- Pour the blueberry juice into a cup for dyeing. You’ll want it big enough to allow the whole egg to fit in the cup.
- Dip one egg into the vinegar for a few seconds. Then place the egg into the blueberry juice. Leave it sit for 5 to 20 minutes, depending on how dark a colour you want.
- Take the egg out of the juice using a spoon and place the egg on the paper towel lined tray.
- Roll the egg around on the paper towel to remove the remaining juice. (Try not to rub the egg with the paper towels to avoid removing or smearing the coloring.)
- Allow the eggs to dry naturally once the excess juice is removed. (Note: Try not to leave the egg in one place on the paper towel or you may end up with a lighter ‘stain’ or print from the paper towel on one side of the egg. For this project, I propped the eggs up against the tray once the excess juice was removed and the bottom of the egg was dried well.)
- Repeat the steps with all eggs above until all eggs are dyed!
Nutritional information is an estimate and provided as a courtesy. The values may vary according to the ingredients and tools that are used. Please use your preferred nutritional calculator for more detailed information.
Other Easter Themed Activities & Printables
- Easter Counting Cards
- Easter Rocky Road
- No Bake Bird’s Nest Treats
- Printable Easter Planner
- Easter Activity Grades 1 – 3
- Easter Tracing and Cutting Strips
- Dyeing Easter Eggs Sequencing Printables
- The Easter Story Printables
- Jesus is Alive! Printables
- Easter Activity Pack – Preschool
- Easter Multiplication Worksheets
- Easter Subtraction Worksheets
- Easter Addition Worksheets
- Easter CVC Baskets
 Milk Bread Rolls
Terry
Great idea! Thanks. I think we will try that this year, but first see if we can draw on them with white crayon and see if it will leave a pattern. Thanks again for the information you share.