
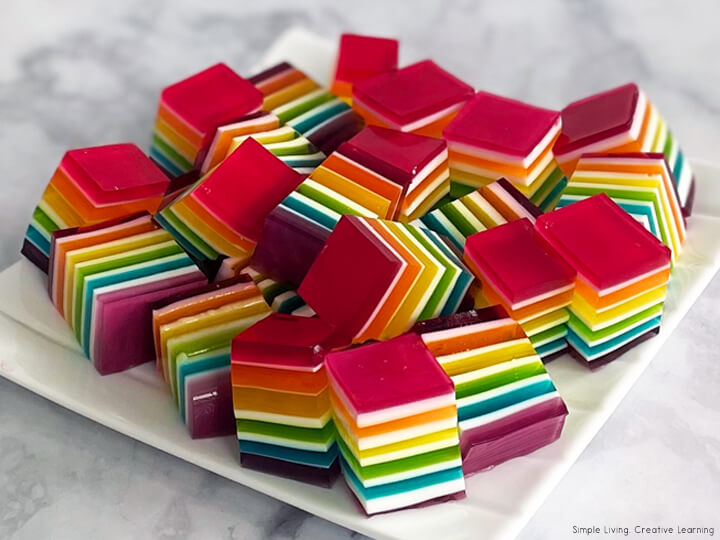
This delicious, easy to make layered rainbow jelly recipe not only tastes amazing, but looks awesome, especially on a party table.

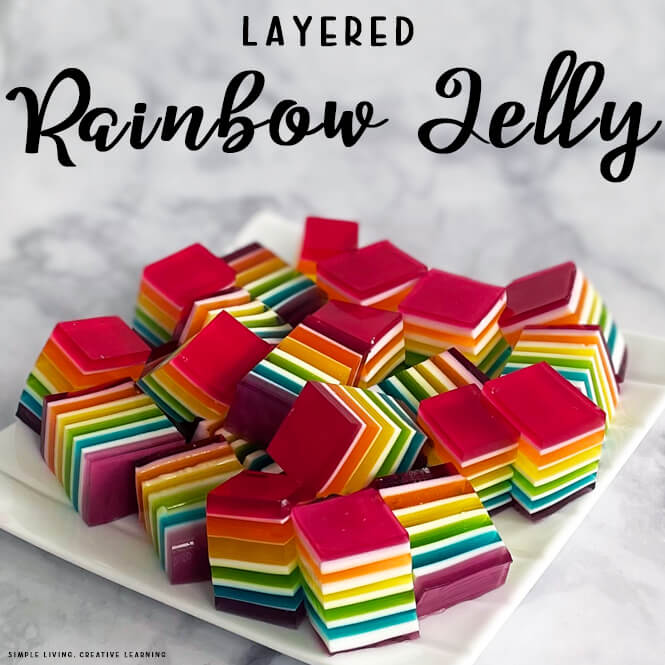
Layered Rainbow Jelly
So I’m not gonna lie. Depending on how many layers you make, this recipe takes a looong time to make! But, it is worth it! The end result looks absolutely amazing! You will need to set a day aside or a few hours over two days to fully complete this recipe.
It is incredibly easy to make – most of the time is spent waiting for the layers to set before adding the next one. The layers also need to be cooled before they can be added onto the slice so that it doesn’t melt the previous layers.
How to Make Layered Rainbow Jelly
Make sure you have all your supplies:
- 3oz / 85g jelly packets in the colours that you want – I used grape, berry blue, lime, lemon, orange and raspberry.
- 16 teaspoons unflavoured gelatine
- 1 ½ (14 oz) cans condensed milk
- 8 ½ cups boiling water
I found when making this, that I made each layer as I went and none of the layers started setting before they were put onto the slice.
Purple Layer – Dissolve one packet of jelly with 1 teaspoon of gelatine and 1 cup of boiling water. Stir until completely dissolved. Pour into a 9×13-inch glass pan and place in the fridge, making sure that the pan is sitting completely flat. Chill until completely set – about 30 minutes.
White Layer – Make this layer straight after placing the previous layer in the fridge so that it has time to cool down. Mix 2 teaspoons of gelatine with 1 cup of boiling water until completely dissolved. Stir in ½ can of condensed milk until combined. Let it sit on the counter to cool to room temperature and the previous layer is set.
Once the purple layer is set, pour ¾ cup of the white layer over it and gently tilt the pan to distribute evenly. Return the pan to the fridge for 30 minutes to set and make the next layer.
Blue Layer – Dissolve one packet of jelly with 1 teaspoon of gelatine and 1 cup of boiling water. Stir until completely dissolved. Let it sit on the counter to cool to room temperature and the previous layer is set.
Once the white layer is set, pour the blue jelly over the top, gently tilt the pan to distribute evenly. Return the pan to the fridge for 30 minutes to set and make the next jelly layer – green.
Green Layer – Dissolve one packet of jelly with 1 teaspoon of gelatine and 1 cup of boiling water. Stir until completely dissolved. Let it sit on the counter to cool to room temperature and the previous layer is set.
Once the blue layer is set, pour ¾ cup of the white layer over it and gently tilt the pan to distribute evenly. Return the pan to the fridge for 30 minutes to set and make the next white layer. Make the next white layers.
White Layer – Mix 2 teaspoons of gelatine with 1 cup of boiling water until completely dissolved. Stir in ½ can of condensed milk until combined. Let it sit on the counter to cool to room temperature and the previous layer is set.
Once the white layer is set, pour the green jelly over the top, gently tilt the pan to distribute evenly. Return the pan to the fridge for 30 minutes to set and make the next jelly layer – yellow.
Once the green layer is set, pour ¾ cup of the white layer over it and gently tilt the pan to distribute evenly. Return the pan to the fridge for 30 minutes to set.
Once the white layer is set, pour the yellow jelly over the top, gently tilt the pan to distribute evenly. Return the pan to the fridge for 30 minutes to set and make the next jelly layer – orange.
Once the yellow layer is set, pour ¾ cup of the white layer over it and gently tilt the pan to distribute evenly. Return the pan to the fridge for 30 minutes to set. Make half of the white layer.
White Layer – Mix 1 teaspoon of gelatine with 1/2 cup of boiling water until completely dissolved. Stir in 1/4 can of condensed milk until combined. Let it sit on the counter to cool to room temperature and the previous layer is set.
Once the white layer is set, pour the orange jelly over the top, gently tilt the pan to distribute evenly. Return the pan to the fridge for 30 minutes to set and make the next jelly layer – red.
Once the orange layer is set, pour ¾ cup of the white layer over it and gently tilt the pan to distribute evenly. Return the pan to the fridge for 30 minutes to set.
Once the white layer is set, pour the red jelly over the top, gently tilt the pan to distribute evenly. Return the pan to the fridge to set.
Once all the layers are done and the jelly is set, slice into 1-inch squares. If you use a serrated blade knife, you will have marks in the jelly, if you use a flat knife, like a paring knife, you won’t have any marks. A small spatula comes in handy when trying to get the jelly squares out of the tray.
Rainbow Jelly Tips
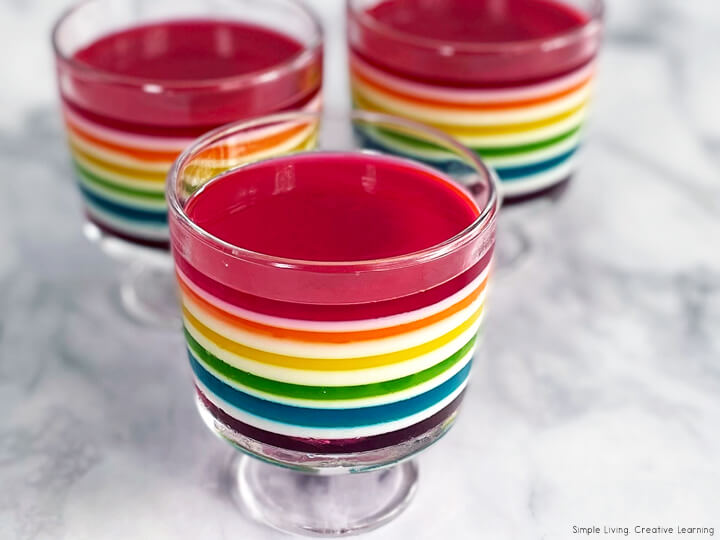
- Use a 9×13 inch glass pan for this recipe or you can place in small clear cups, though you will need quite a few depending on the size of the cups.
- I didn’t grease mine and the jelly pieces came out fine. You could spray with a little oil if you wish or with a thin layer of mayonnaise.
- I used 6 layers of different coloured jelly, though you can use as many and whatever colours you want – read variations below
- The jelly should not set while on the counter at room temperature, though if it does, just pop it in the microwave for about 10-20 seconds to warm it up slightly. Mix it together and let cool before pouring onto the slice.
- The same goes with the white/condensed milk layer – it should not set, though pop it in the microwave if it does.
- Make sure your pan is sitting completely flat when in the fridge setting or otherwise your layers make be a bit off.
- Make sure that the layers are completely set before pouring on the next layer. Don’t rush this as you don’t want the layers to melt the previous ones, mixing them all up.
- Thin layers not only look good, they also make sure that the jelly slice will not overflow from the pan and the jelly slices won’t be to tall when completed.
Rainbow Jello Variations
- Christmas – use layers of red and green jelly
- Valentine’s Day – use layers of red and pink jelly
- Australia Day / Fourth of July – use red, blue and thicker white layers
- Halloween – use orange and purple layers
- Birthday – use your favourite colours
Dessert Recipes
- Pancake Board
- Waffle Board
- S’Mores Snack Board
- Australian Platter
- Rainbow Fruit Platter
- Entertaining Cheese Platter
- Fondue Board
- Pavlova Dessert Board
- Easter Dessert Board
- Apple Turnovers
- Slow Cooker Caramel in a Tin
- Apple Crumble
- Banana, Mango and Raspberry Popsicles
- Milk Bread Rolls
- Jelly Cheesecake Slice
- Strawberry and White Chocolate Cupcakes
- Strawberry Coconut Slice
- Choc Chip Cookie Slice
- Chocolate Weet-Bix Slice
- Chocolate Mousse
- Churros with Hot Chilli Chocolate
- Chocolate Brownies
- Chocolate Fudge Slice
- Apple and Sour Cream Slice
- Lemon Meringue Pie
- Raspberry and White Chocolate Cheesecake Slice
- Chocolate Cheesecake Slice
- Tim Tam Cheesecake
- Raspberry and White Chocolate Cheesecake
Layered Rainbow Jelly
Ingredients
- 3oz (85g) jelly packets in the colours that you want, I used grape, berry blue, lime, lemon, orange and raspberry
- 16 tsp unflavoured gelatine
- 1 1/2 (14oz) cans condensed milk
- 8 1/2 cups boiling water
Instructions
- I found when making this, that I made each layer as I went and none of the layers started setting before they were put onto the slice.
- Purple Layer - Dissolve one packet of jelly with 1 teaspoon of gelatine and 1 cup of boiling water. Stir until completely dissolved. Pour into a 9x13-inch glass pan and place in the fridge, making sure that the pan is sitting completely flat. Chill until completely set - about 30 minutes.
- White Layer - Make this layer straight after placing the previous layer in the fridge so that it has time to cool down. Mix 2 teaspoons of gelatine with 1 cup of boiling water until completely dissolved. Stir in ½ can of condensed milk until combined. Let it sit on the counter to cool to room temperature and the previous layer is set.
- Once the purple layer is set, pour ¾ cup of the white layer over it and gently tilt the pan to distribute evenly. Return the pan to the fridge for 30 minutes to set and make the next layer.
- Blue Layer - Dissolve one packet of jelly with 1 teaspoon of gelatine and 1 cup of boiling water. Stir until completely dissolved. Let it sit on the counter to cool to room temperature and the previous layer is set.
- Once the white layer is set, pour the blue jelly over the top, gently tilt the pan to distribute evenly. Return the pan to the fridge for 30 minutes to set and make the next jelly layer - green.
- Green Layer - Dissolve one packet of jelly with 1 teaspoon of gelatine and 1 cup of boiling water. Stir until completely dissolved. Let it sit on the counter to cool to room temperature and the previous layer is set.
- Once the blue layer is set, pour ¾ cup of the white layer over it and gently tilt the pan to distribute evenly. Return the pan to the fridge for 30 minutes to set and make the next white layer. Make the next white layers.
- White Layer - Mix 2 teaspoons of gelatine with 1 cup of boiling water until completely dissolved. Stir in ½ can of condensed milk until combined. Let it sit on the counter to cool to room temperature and the previous layer is set.
- Once the white layer is set, pour the green jelly over the top, gently tilt the pan to distribute evenly. Return the pan to the fridge for 30 minutes to set and make the next jelly layer - yellow.
- Once the green layer is set, pour ¾ cup of the white layer over it and gently tilt the pan to distribute evenly. Return the pan to the fridge for 30 minutes to set.
- Once the white layer is set, pour the yellow jelly over the top, gently tilt the pan to distribute evenly. Return the pan to the fridge for 30 minutes to set and make the next jelly layer - orange.
- Once the yellow layer is set, pour ¾ cup of the white layer over it and gently tilt the pan to distribute evenly. Return the pan to the fridge for 30 minutes to set. Make half of the white layer.
- White Layer - Mix 1 teaspoon of gelatine with 1/2 cup of boiling water until completely dissolved. Stir in 1/4 can of condensed milk until combined. Let it sit on the counter to cool to room temperature and the previous layer is set.
- Once the white layer is set, pour the orange jelly over the top, gently tilt the pan to distribute evenly. Return the pan to the fridge for 30 minutes to set and make the next jelly layer - red.
- Once the orange layer is set, pour ¾ cup of the white layer over it and gently tilt the pan to distribute evenly. Return the pan to the fridge for 30 minutes to set.
- Once the white layer is set, pour the red jelly over the top, gently tilt the pan to distribute evenly. Return the pan to the fridge to set.
- Once all the layers are done and the jelly is set, slice into 1-inch squares. If you use a serrated blade knife, you will have marks in the jelly, if you use a flat knife, like a paring knife, you won't have any marks. A small spatula comes in handy when trying to get the jelly squares out of the tray.
Notes
- Use a 9x13 inch glass pan for this recipe or you can place in small clear cups, though you will need quite a few depending on the size of the cups.
- I didn't grease mine and the jelly pieces came out fine. You could spray with a little oil if you wish or with a thin layer of mayonnaise.
- I used 6 layers of different coloured jelly, though you can use as many and whatever colours you want - read variations below
- The jelly should not set while on the counter at room temperature, though if it does, just pop it in the microwave for about 10-20 seconds to warm it up slightly. Mix it together and let cool before pouring onto the slice.
- The same goes with the white/condensed milk layer - it should not set, though pop it in the microwave if it does.
- Make sure your pan is sitting completely flat when in the fridge setting or otherwise your layers make be a bit off.
- Make sure that the layers are completely set before pouring on the next layer. Don't rush this as you don't want the layers to melt the previous ones, mixing them all up.
- Thin layers not only look good, they also make sure that the jelly slice will not overflow from the pan and the jelly slices won't be to tall when completed.
Nutrition
Nutritional information is an estimate and provided as a courtesy. The values may vary according to the ingredients and tools that are used. Please use your preferred nutritional calculator for more detailed information.
 Skip Counting Posters