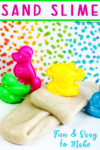
This fun and easy to make Sand Slime is such a great activity to keep your young children enjoying themselves while working on their fine motor skills.

Check out the list of materials that we use with this activity.
Sand Slime
To make these awesome, stretchy slime, you will need:
- 1 x 6oz bottle of Elmer’s Glue in Clear
- ¼ cup of warm water (approximately)
- ½ tsp bicarb soda (baking soda)
- 1 TBSP contact lens solution (containing boric acid)
- ½ to 1 cup play sand, depending on how sandy you want the slime to be

This slime is so easy to make, first you need to empty the glue into a large bowl. Then, fill the empty glue bottle with ¼ cup of warm water – until it is about ⅓ full. Add the lid and shake. This will combine the rest of the glue in the bottle with the water. When done, the pour the water into the bowl with the glue and stir to combine.
Add the bicarb-soda to the glue and water and stir to mix thoroughly. Now it is time to add the sand.

Slowly add the sand, a little at a time, mix well and then add more sand until you reach your desired consistency.
Add the contact lens solution slowly to the mixture stirring well as you go. Only add enough of this solution to bring the glue together into a soft ball. If you are using a glitter glue, you will require more contact lens.

Remove from the bowl. This slime will be sticky to start with.
Begin playing with this fun slime, stretching and kneading it the way you would if it were bread dough. This will bring the slime together. When the slime is no longer sticky, it is ready!

If you are keeping this slime, it is best to store it in an airtight container in the fridge when not using.

More Slime Recipes

Sand Slime
Ingredients
- 1 6oz bottle of Elmer's Clear Glue
- 1/4 cup warm water
- 1/2 tsp bicarbonate of soda
- 1 TBSP contact lens solution, containing boric acid
- 1/2 - 1 cup play sand
Instructions
- Empty the glue into a large bowl.
- Then, fill the empty glue bottle with ¼ cup of warm water - until it is about ⅓ full. Add the lid and shake. This will combine the rest of the glue in the bottle with the water.
- When done, the pour the water into the bowl with the glue and stir to combine.
- Add the bicarb-soda to the glue and water and stir to mix thoroughly. Now it is time to add the sand.
- Slowly add the sand, a little at a time, mix well and then add more sand until you reach your desired consistency.
- Add the contact lens solution slowly to the mixture stirring well as you go. Only add enough of this solution to bring the glue together into a soft ball. If you are using a glitter glue, you will require more contact lens.
- Remove from the bowl. This slime will be sticky to start with.
- Begin playing with this fun slime, stretching and kneading it the way you would if it were bread dough. This will bring the slime together. When the slime is no longer sticky, it is ready!
- If you are keeping this slime, it is best to store it in an airtight container in the fridge.
 Instant Pot Corned Beef and Vegetables