
A great, green alternative to disposable cling-wrap is beeswax wraps. These DIY reusable beeswax wraps are so easy to make, though can be a little fiddly at times, but they work great.

What are beeswax wraps?
They are pieces of fabric that have been coated in pure beeswax. They are able to be moulded into shapes, can be slightly sticky and are used to protect food. They are also reusable, non-toxic and biodegradable which makes them great to use in your home.
As beeswax has natural antibacterial and anti-fungal properties making these wraps breathable and able to lock in moisture which helps to keep food fresher for longer. And, as pure beeswax is used, you will find that they have a slight smell – of beeswax.
Due to the way they can be reused multiple times, not only are you saving on money, you are reducing the amount of chemicals in your home and reducing waste.
What’s the best fabric to use?
100% cotton, hemp or linen! Organic, natural fabrics will soak up the beeswax, while you will find that synthetic fabrics tend to not absorb it as easily, and the beeswax will eventually freak up and fall off.
The fabric should also be a thin to medium weight like that of a t-shirt, not too thick like flannel. If you have an old cotton t-shirt that doesn’t fit anymore, then why not reuse that?
Using Reusable Beeswax Wraps
There are many ways to use these wraps.
- To store cut up fruit and vegetables, cheese, bread and more
- Use to cover bowls, food storage containers and glass jars instead of using cling wrap (plastic wrap)
- Cover your proofing baskets and bowls of dough
- I would suggest not to use these with raw meat
- As they are good at sticking to themselves, pinch the edges together to create a hold
- If you find that they are feeling a tad stiff, warm them between your hands to make them more pliable
DIY Reusable Beeswax Wraps
To make these, I tried two different methods. I found the oven method so much easier and quicker as I could have two wraps going at once – two shelves in the oven.

What you will need:
- Beeswax Beads
- Fabric – thin, cotton fabric
- Pinking Shears
- Baking Paper
- Paintbrush

Instructions for making Reusable Beeswax Wraps
Oven Method
- Preheat the oven to its lowest setting (100˚C)
- Line a baking tray with baking paper
- With the pinking shears, cut the fabric into the shapes and sizes that you want, making sure they fit into within the confines of the baking paper on the tray. I made a few different sizes, some rectangle and some square. Using pinking shears for this instead of normal scissors helps to reduce the fraying edges.
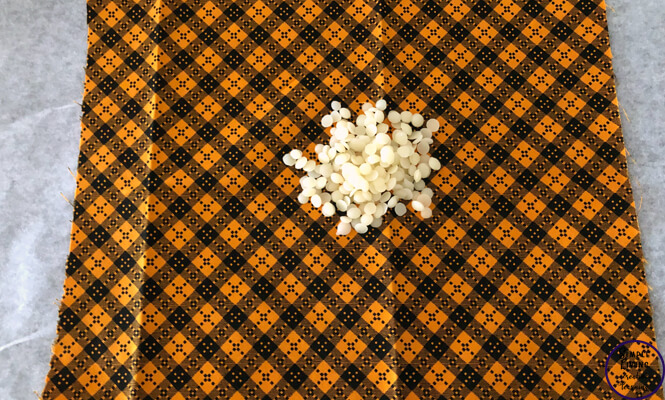
- Lay one piece of fabric, flat on the baking paper.
- Sprinkle with the beeswax beads. About 2 TBSP for a 12 x 12 inch (30cm x 30cm) piece of fabric, though it is best to start with less as you can always add more.
- Place the tray in the oven and watch as the beeswax melts, about 5 – 10 minutes.
- Once the beeswax has all melted, remove from the oven and using the paintbrush, sweep the wax around the fabric, making sure that all the edges and corners of the fabric have been saturated in beeswax. You will to work fast here before the wax hardens again.
- Peel the fabric off the baking paper and, holding two corners, wave it around in the air for a few seconds until the wax hardens. Then, hang over a chair or a bowl to fully dry.
- Repeat until you have used all your fabric pieces.
Iron Method
- Measure and cut the fabric into the shapes and sizes that you want.
- Lay a large sheet of baking paper down on your ironing board. The baking paper needs to be larger than the piece of fabric.
- Add beeswax to the middle of the fabric – about 2 TBSP for a 12 x 12 inch (30cm x 30cm) piece of fabric, though it is best to start with less as you can always add more.
- Place a second large piece of baking paper over the top of the fabric and beeswax beads.
- With your iron on low /wool setting start running the iron over the beeswax.
- As the beeswax starts to melt, add gentle pressure while moving the wax towards the edges and corners.
- If you need more beeswax, lift the edges of the top layer of baking paper and sprinkle on more.
- Once the entire piece of fabric is saturated in the beeswax, quickly lift the top sheet of baking paper off, grab two corners of the fabric and peel it off the back baking paper sheet.
- Wave it around in the air for a few seconds until the wax hardens. Then, hang over a chair or a bowl to fully dry.
- Repeat until you have used all your fabric pieces.

Notes
- I found the oven method limiting as to the size I could make the wraps. I could use larger pieces of fabric with the iron method.
- These covers are not air or water tight. They are great for covering leftovers or cut fruit and vegetables.
- Hand wash only in warm, soapy water and hang to dry.
- Store flat, rolled or folded in a cool, dry place.
- They mould better over bowls when warmed up gently between your hands.
- Do not use to cover raw meat.
- With proper care, they should last 6-12 months, though if the beeswax looks like it is starting to flake, you could repeat the process above on the same piece of fabric or start again from scratch with new fabric.
Other Sewing Projects
- How to Sew a Felt Alphabet
- Upcycled Mens Decoupage Planters
- DIY Needle Felt Book
- Felt Leaf Sleeping Bags
- Super Easy Cushion Cover
- Sewing Hems & Keeping the Original
- How to Sew a Face Mask
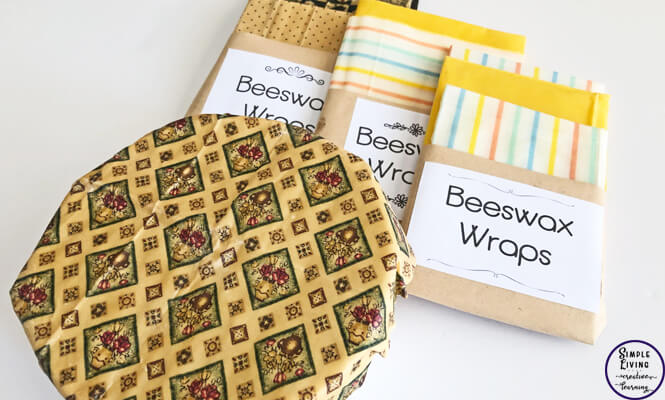
I created the white labels that you can see on the photos. I printed them out on white sticky paper and then cut to size before placing them onto the brown paper. You can get a copy of these labels, for free, by signing up below:

DIY Reusable Beeswax Wraps
Equipment
- Pinking Shears
- Baking paper
- Paintbrush
Ingredients
- Beeswax Beads
- Fabric thin - cotton, linen or hemp
Instructions
Oven Method
- Preheat the oven to its lowest setting (100˚C).
- Line a baking tray with baking paper.
- With the pinking shears, cut the fabric into the shapes and sizes that you want, making sure they fit into within the confines of the baking paper on the tray.I made a few different sizes, some rectangle and some square. Using pinking shears for this instead of normal scissors helps to reduce the fraying edges.
- Lay one piece of fabric, flat on the baking paper.
- Sprinkle with the beeswax beads. About 2 TBSP for a 12 x 12 inch (30cm x 30cm) piece of fabric, though it is best to start with less as you can always add more.
- Place the tray in the oven and watch as the beeswax melts, about 5 - 10 minutes.
- Once the beeswax has all melted, remove from the oven and using the paintbrush, sweep the wax around the fabric, making sure that all the edges and corners of the fabric have been saturated in beeswax. You will to work fast here before the wax hardens again.
- Peel the fabric off the baking paper and, holding two corners, wave it around in the air for a few seconds until the wax hardens.
- Then, hang over a chair or a bowl to fully dry.
- Repeat until you have used all your fabric pieces.
Iron Method
- Measure and cut the fabric into the shapes and sizes that you want.
- Lay a large sheet of baking paper down on your ironing board. The baking paper needs to be larger than the piece of fabric.
- Add beeswax to the middle of the fabric - about 2 TBSP for a 12 x 12 inch (30cm x 30cm) piece of fabric, though it is best to start with less as you can always add more.
- Place a second large piece of baking paper over the top of the fabric and beeswax beads.
- With your iron on low /wool setting start running the iron over the beeswax.As the beeswax starts to melt, add gentle pressure while moving the wax towards the edges and corners.If you need more beeswax, lift the edges of the top layer of baking paper and sprinkle on more.
- Once the entire piece of fabric is saturated in the beeswax, quickly lift the top sheet of baking paper off, grab two corners of the fabric and peel it off the back baking paper sheet.
- Wave it around in the air for a few seconds until the wax hardens. Then, hang over a chair or a bowl to fully dry.
- Repeat until you have used all your fabric pieces.
 Mother’s Day Card Craft
Donna @ Modern on Monticello
I haven’t tried this yet but there seem to be a good way to keep from throwing out more plastic. Thanks for sharing at #HomeMattersParty